A Guide to Building a Home Health Monitoring Kit

A home health monitoring kit is a small set of reliable devices, kept together, that lets you check key measurements when you need to. It is not about tracking everything. It is about having the right tools on hand, knowing how to use them and recording what they show.
Key points
- A core kit contains a blood pressure monitor, a thermometer, a scale and a way to record results.
- Add condition-specific devices, such as a glucose meter or pulse oximeter, on your doctor’s advice.
- Keep the kit together, maintained and accompanied by instructions and emergency numbers.
Step 1: Decide what you need to monitor
Think about your household.
- Adults over 40, or anyone with high blood pressure or risk factors: blood pressure.
- Children or anyone prone to infections: temperature.
- Weight management or heart failure: weight.
- Diabetes: blood glucose, as your team directs.
- Lung or heart conditions: oxygen saturation, if your doctor recommends it.
Ask your doctor or pharmacist which measurements are worth tracking for you.
Step 2: Choose the core devices
Blood pressure monitor
Choose an automatic upper arm model that has been validated for accuracy; in the United States, the Validated Device Listing identifies such devices. Make sure the cuff fits your arm. Our range includes the Automatic Upper Arm Blood Pressure Monitor and Upper Arm Cuff, Large; check any model you are considering against the listing.
Thermometer
A digital thermometer is inexpensive and dependable. MedlinePlus advises against glass mercury thermometers. See our Digital Thermometer with Flexible Tip.
Scale
A digital scale placed on a hard, level floor. See our Digital Body Weight Scale.
Record book
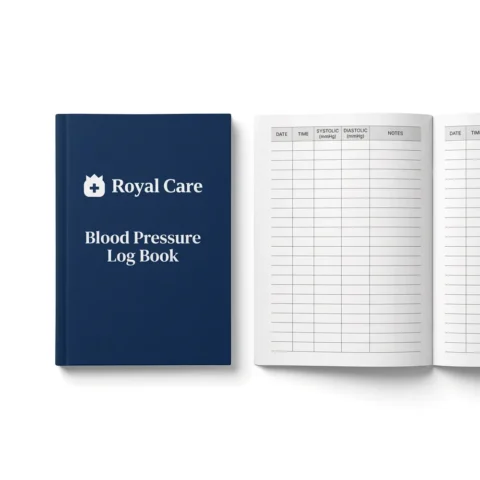
A notebook, log book or app. Our Blood Pressure Log Book has columns for readings, pulse and notes.
Step 3: Add condition-specific items
Only if recommended for you:
- Blood glucose meter, strips, lancets and sharps container
- Pulse oximeter, such as our Fingertip Pulse Oximeter
- Peak flow meter for asthma
- Pill organizer to keep track of daily medicines
Step 4: Include supporting items
- Spare batteries for each device
- Instruction manuals
- A list of your medicines, allergies and conditions
- Contact details for your doctor, pharmacy and emergency services
- Your personal targets, written down: blood pressure, glucose range and so on
- A basic first aid kit, stored alongside
Step 5: Set up and learn each device
The FDA encourages home users to read device instructions carefully and to ask a healthcare professional to demonstrate anything that is unclear.
- Read the manual.
- Set the date, time and units.
- Take a few practice readings.
- Take the device to an appointment to check your technique and compare results.
Step 6: Organize and store the kit
- Keep everything in one container or shelf, in a cool, dry place that is not the bathroom.
- Use cases to protect devices, for example our Blood Pressure Monitor Storage Case.
- Keep the kit out of reach of children but easy for adults to reach.
- Make sure other household members know where it is.
Step 7: Establish a routine
- Blood pressure: as your doctor advises, often morning and evening during monitoring periods.
- Weight: same time of day, similar clothing, weekly or as instructed.
- Temperature: when someone feels unwell.
- Condition-specific checks: on your prescribed schedule.
Record each result with the date and time.
Step 8: Maintain the kit
- Wipe devices clean after use, following their instructions.
- Check batteries monthly.
- Check expiration dates on any consumables.
- Compare your blood pressure monitor with a clinic device yearly.
- Replace anything damaged or unreliable.
Knowing what the numbers mean
Ask your doctor for the ranges that apply to you. General reference points for adults include:
- blood pressure below 120/80 mm Hg is normal;
- a temperature of 100.4°F (38°C) or higher is generally considered a fever;
- a resting pulse of 60 to 100 beats per minute is typical.
Knowing when to act
Write down, with your doctor’s help:
- readings that should prompt a phone call;
- readings or symptoms that need emergency care.
Call 911 for chest pain, severe shortness of breath, signs of stroke, fainting or confusion, regardless of what any device shows.
A sample starter kit
- Validated upper arm blood pressure monitor with correctly sized cuff
- Digital thermometer
- Digital scale
- Log book and pen
- Spare batteries
- Medicine list and emergency contacts
The bottom line
A few dependable devices, kept together and used correctly, give you and your doctor useful information when it counts. Build your kit around your needs and keep it ready. Start with the essentials in our heart and blood pressure department.
Sources
- U.S. Food and Drug Administration. Home Use Devices.
- American Medical Association. US Blood Pressure Validated Device Listing.
- Centers for Disease Control and Prevention. Measuring Your Blood Pressure.
- MedlinePlus. Temperature measurement.
Shop Heart & Blood Pressure
Products from the department this guide belongs to.



More heart & blood pressure guides

The Importance of Regular Health Monitoring
Many health risks have no symptoms. Learn which numbers to track, such as blood pressure, cholesterol, blood sugar and weight, and how often to…

Understanding Systolic and Diastolic Blood Pressure
The top number is systolic pressure and the bottom is diastolic. Learn what each means, the AHA blood pressure categories and why both numbers…

Understanding Blood Pressure Measurement Accuracy
Accuracy depends on a validated device, the right cuff, good technique and regular checks. Learn what validation means and how to check your monitor.